
Until recently, legal research costs were a significant part of overhead for most law firms. Whether it was maintaining a costly legal library full of books or, more recently, paying an expensive monthly subscription to Westlaw or LexisNexis, high-cost legal research tools were a necessary expense that few law firms could avoid.
Fortunately, times have changed and lawyers in 2022 have lots of different legal research tools to choose from at a variety of price points. Some are available at a discount or for free as part of your bar association membership, and there are even very robust, free options like Google Scholar.
If you’re not yet familiar with Google Scholar, then you’re missing out. It’s a free, easy-to-use legal research platform that’s ideal for many solo and small firm lawyers and provides you with access to a broad spectrum of both federal and state caselaw. In this guide, I’ll get you up-to-date on the ins and outs of using Google Scholar for caselaw research.
Once you dive in and give it a try, you may just decide that Google Scholar is the right legal research tool for your law firm.
What’s included in Google Scholar?
Google Scholar’s coverage of caselaw is impressive. It includes court opinions from all 50 states and all federal courts. The specific jurisdictions covered are described here:
Now that you have an understanding of its coverage, let’s move onto nitty gritty: how to search Google Scholar’s caselaw database.
Review your default settings
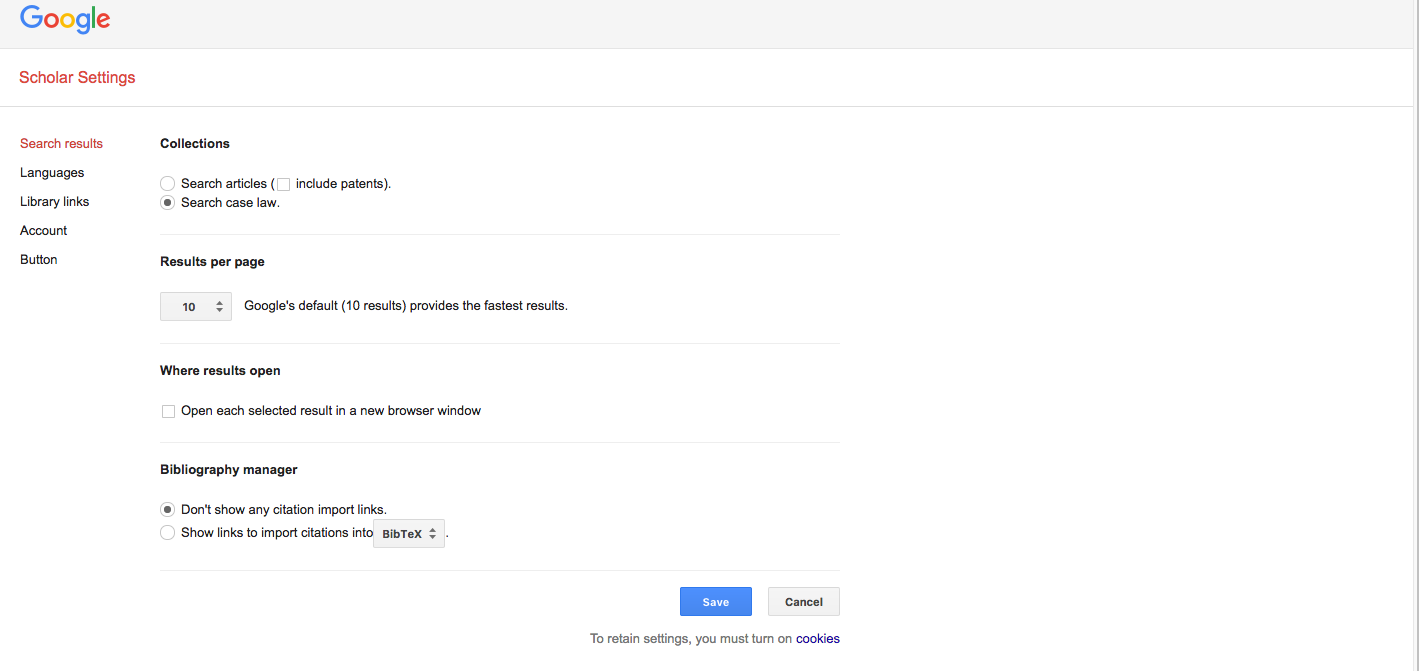
Before you dive in, refine your settings so that your search results will be the most useful to you. Click on the arrow in the upper righthand corner located next to the “My citations” button and click on “Settings” as shown below (this is also where you can refine your search terms as discussed more fully below):
You’ll be taken to a page that will allow you to change your settings to, among other things, change the number of search results per page, and determine whether results will be opened in a new browser page. After clicking “Save,” you’ll be returned to the main search page:
Choose your caselaw database(s)
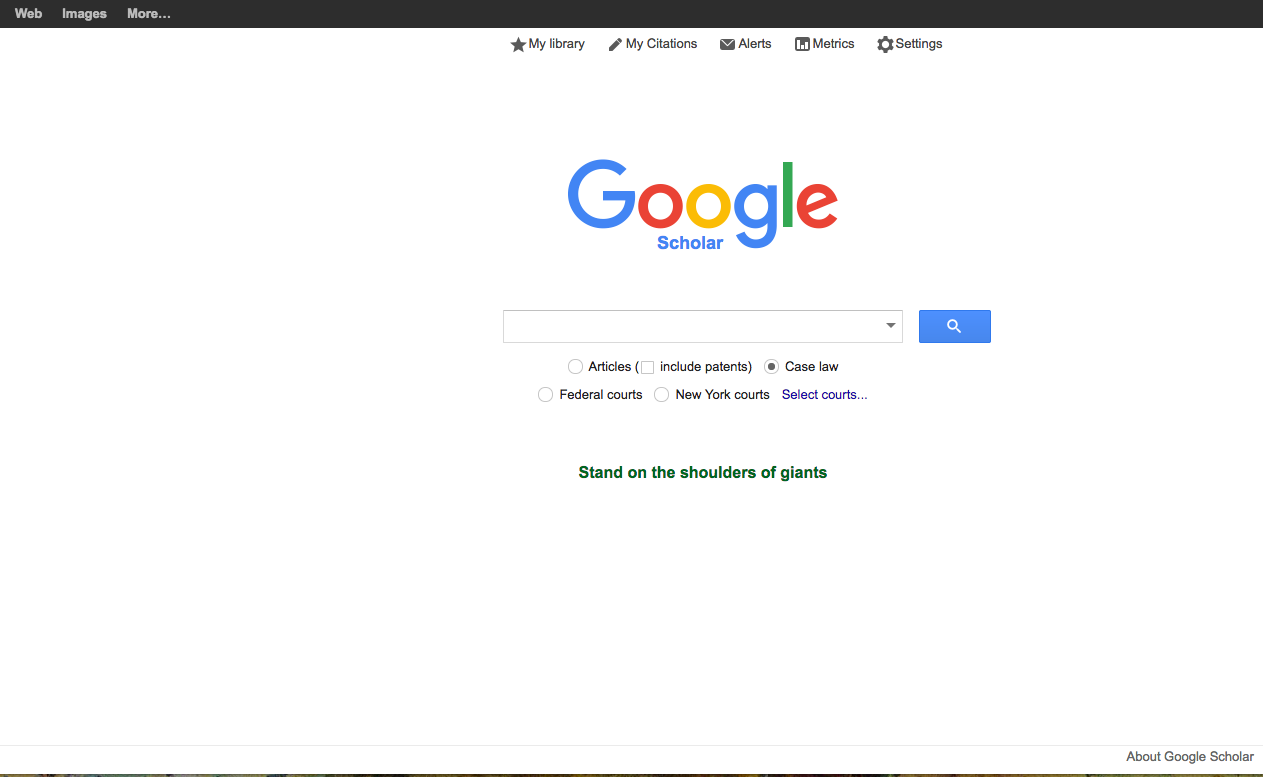
First you need to check “Case law,” which is located to the right under the search bar. Then, before you enter your search terms, you’ll need to choose the jurisdictions you’d like to search. To do that, you simply go to the Google Scholar start page and click on “Select courts,” which is located underneath the search box on the right, as shown below:
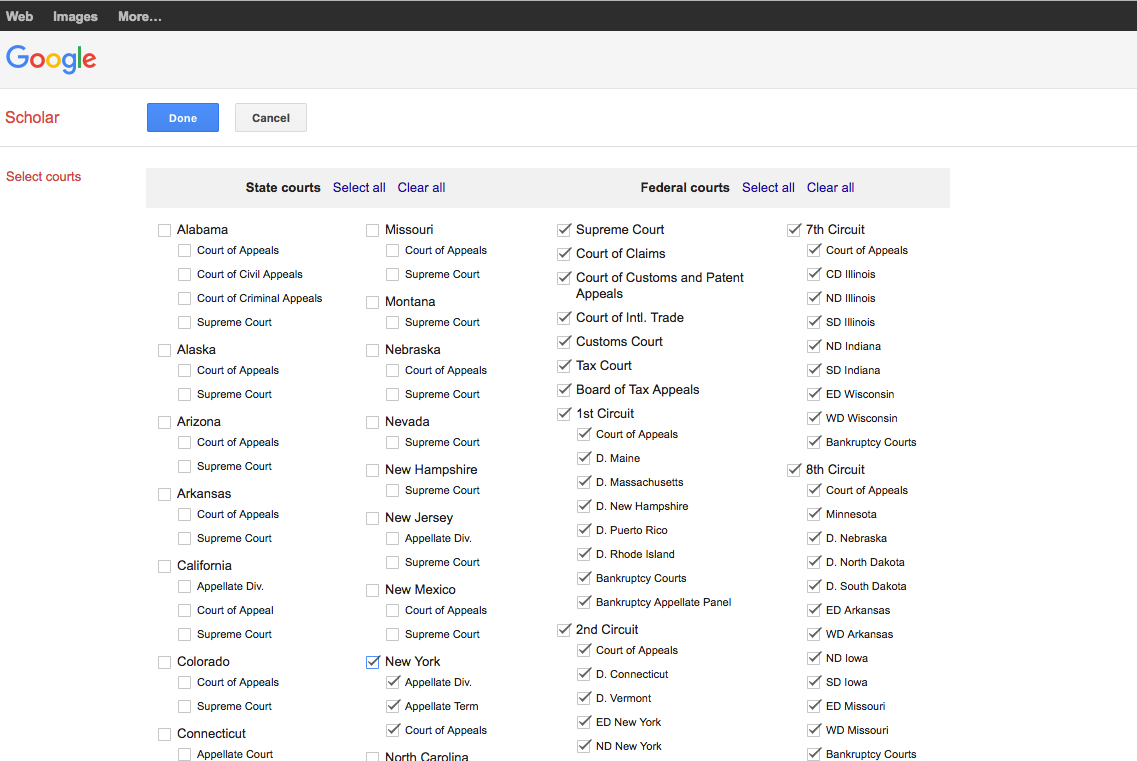
You’ll notice that once you’ve used Google Scholar a few times, it will default to your preferred courts, which in my case are federal courts and New York (since I happen to live in New York). Once you click on “Select courts,” you’ll be taken to the page below where you can check the various court databases that you’d like to include in your search. The state courts are listed in alphabetical order. To view courts that are not listed below, you’ll simply need to scroll down the page to locate them:
Enter your search terms
Once you’ve chosen your jurisdiction, enter your search terms and click the search icon. Your search results will then appear, listed by relevance as the default. If you’d rather the cases be sorted by date, you can click on “sort by date,” located near the bottom of the lefthand sidebar. You’ll notice that your search terms will be highlighted in the search results. You can then limit the search results by clicking on the date limitations shown in the lefthand column:
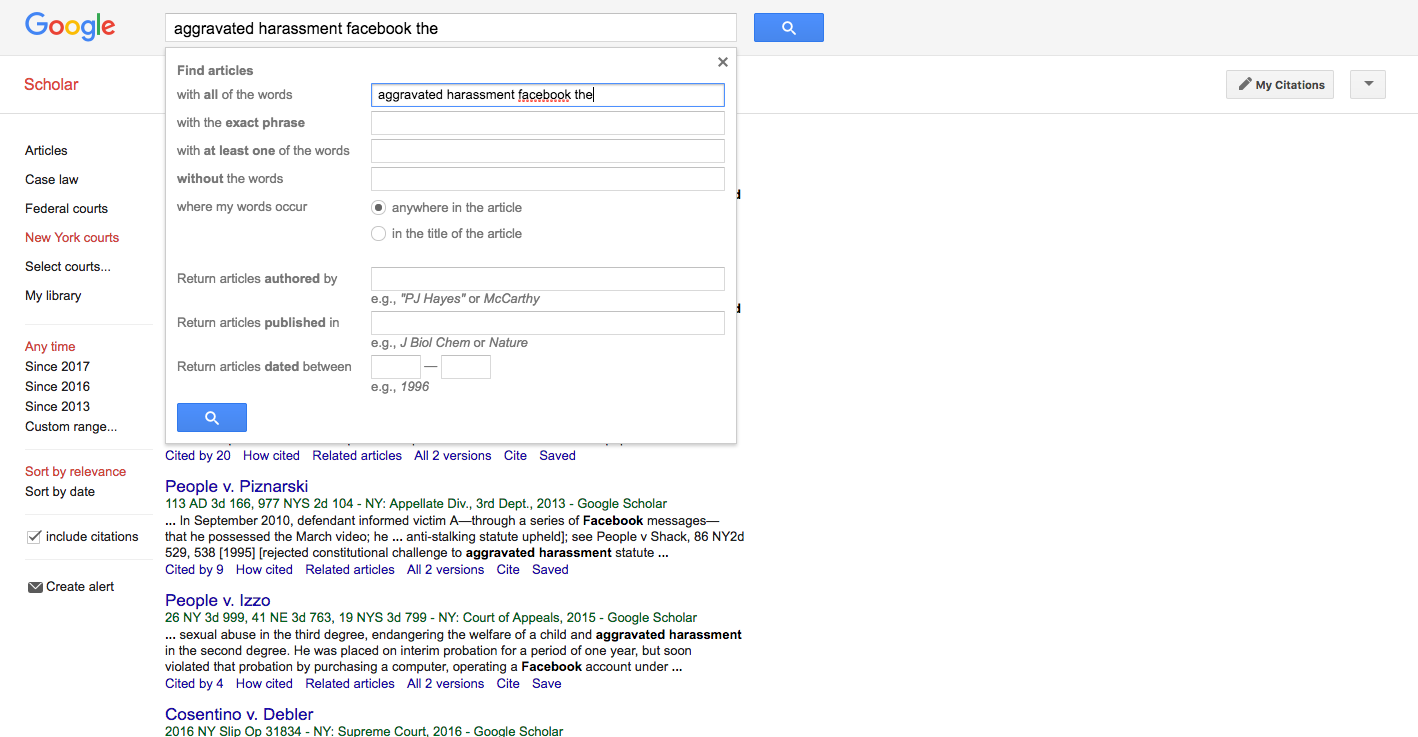
Refine your search terms
You can refine your search terms by clicking on the same icon on the upper righthand corner that you clicked on when you established your default settings. From the drop-down menu, select “Advanced search” and the following window will appear wherein you can enter your revised search terms or otherwise limit your search parameters. Once you’re happy with the newly revised search terms, run the search and you’ll be returned to the search results page.
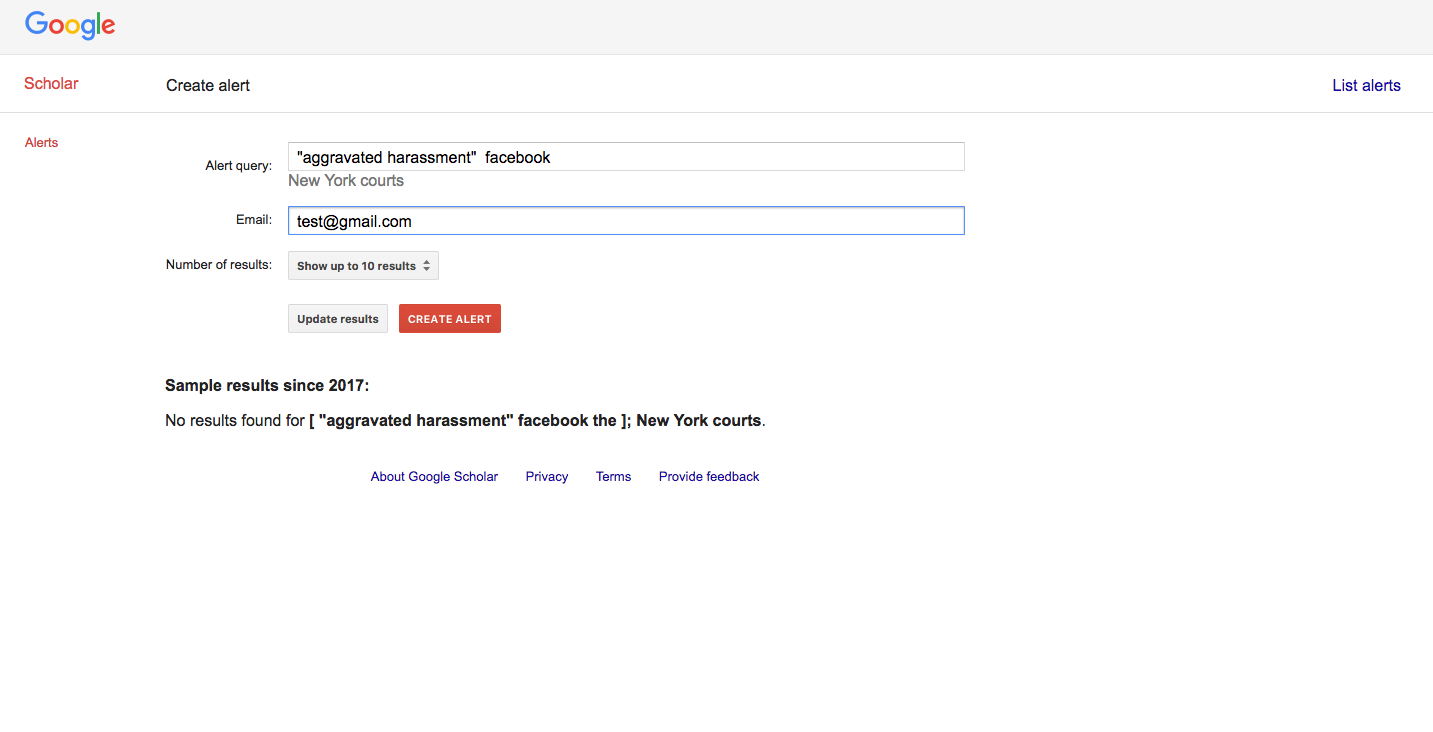
If you’d like to create an alert for this search so that you’ll be notified if new cases are handed down that fall within your search parameters, click on “Create an alert” at the bottom of the righthand sidebar. You’ll then be taken to a page where you can enter your email address and create the alert:
Refine search results
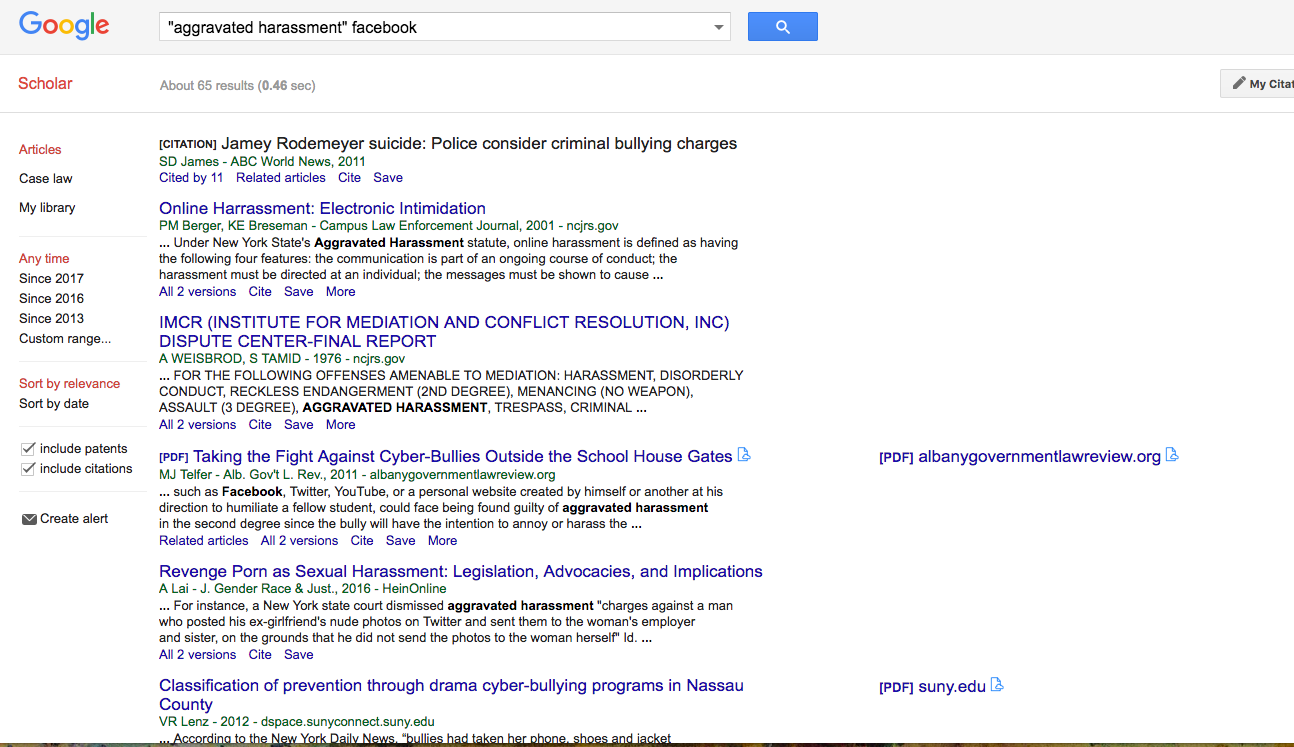
Once you’ve run a search, you’ll notice that the results can be sorted. You can filter the results by clicking on the terms located in the righthand sidebar. You can view “Articles” or “Caselaw,” and can further sort the results by court (in this instance “Federal courts” or “New York courts”) or by date range. Below, you’ll see that the results have been filtered to include only articles. If the article is available and viewable online rather than as an abstract, you’ll see a link to the PDF on the righthand side of the page:
Reading cases
If you’re researching caselaw and a case from the search results sounds on point, simply click on the case title and you’ll be taken to the full case as shown below. Most cases or statutes cited to within the case will be hyperlinked, but not all are.

Exploring case treatment
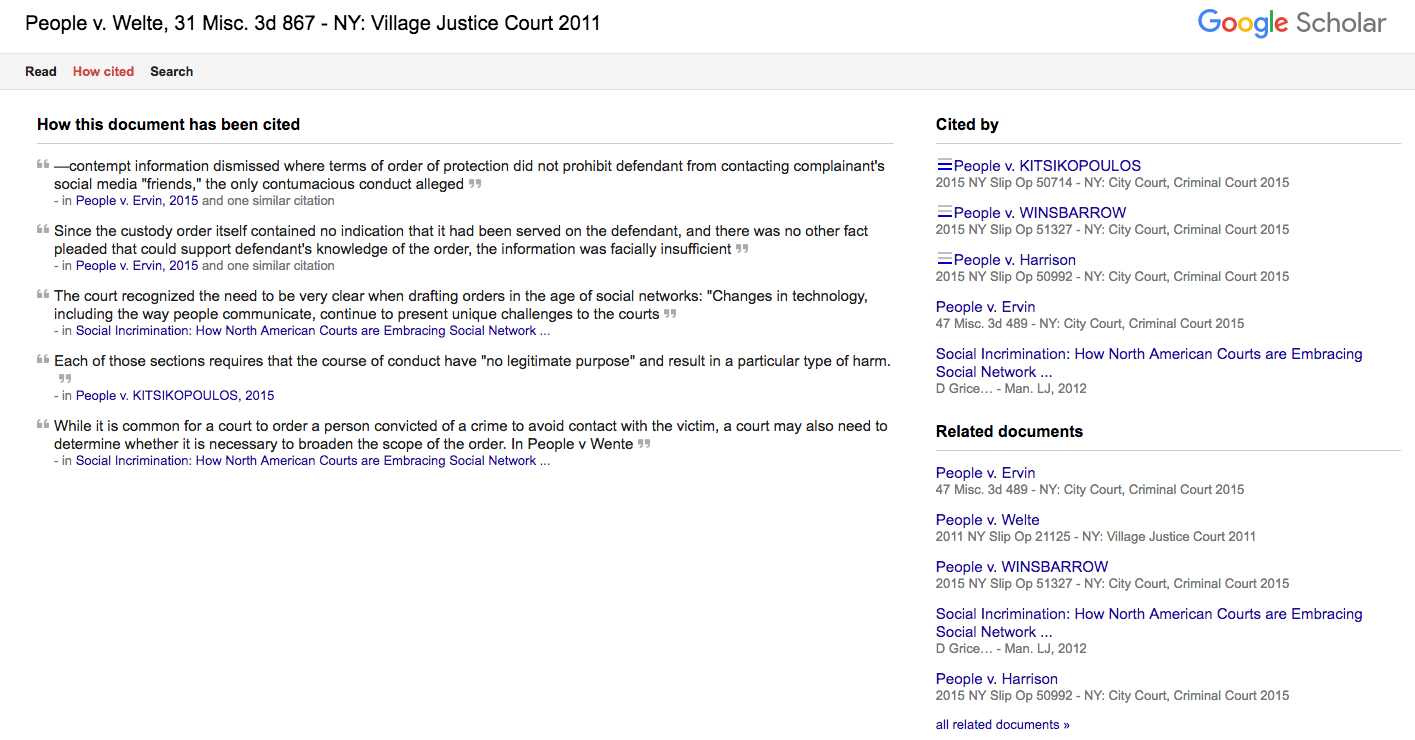
While viewing a case, as shown above, you can explore case treatment by clicking on “How cited” in the upper lefthand corner of the page. As you can see below, that will take you to a page that lists (in the righthand column) the cases and documents that have cited your case. The three horizontal lines to the left of each citing case indicate the strength of citation as it relates to your case. In this case, People v. Kitsikopoulos is the most relevant citing case, as indicated by two out of three lines being highlighted. Also note that on the left side of the page, you’ll find the most relevant excerpts from the citing cases, which also helps you determine which ones are most applicable to the issues you’re researching.
Another way to explore case treatment
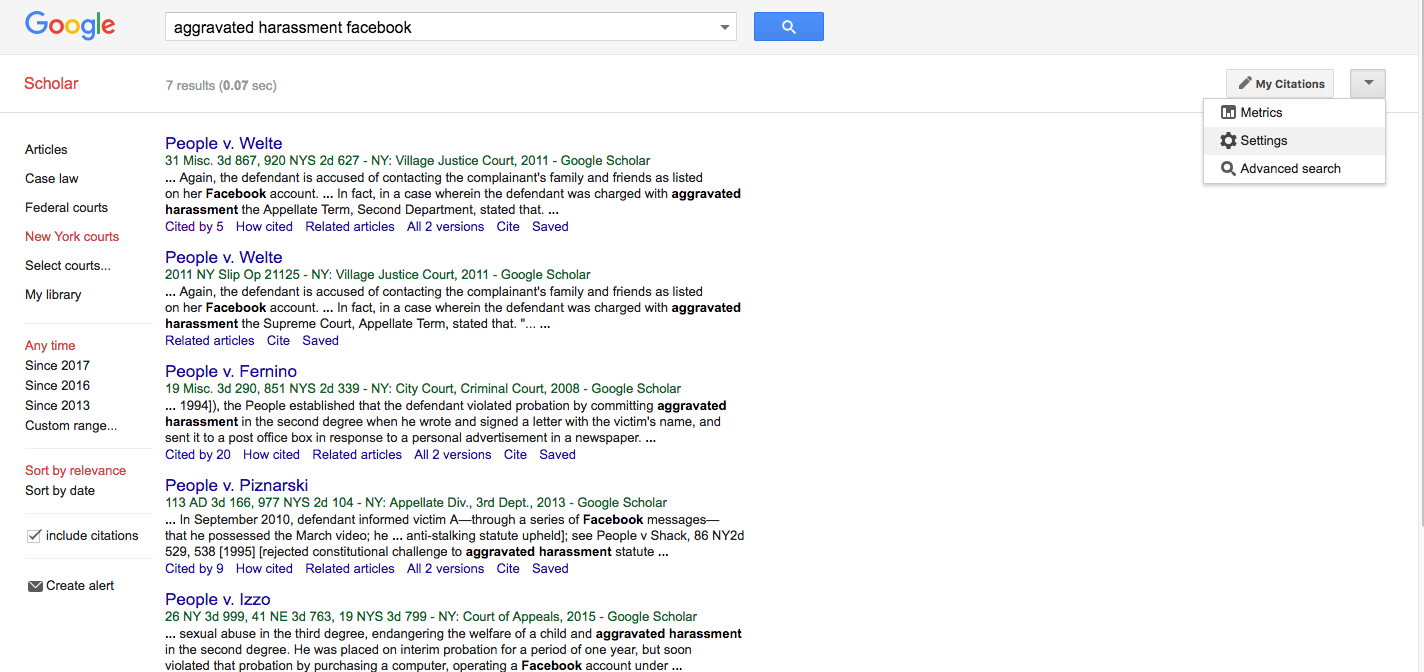
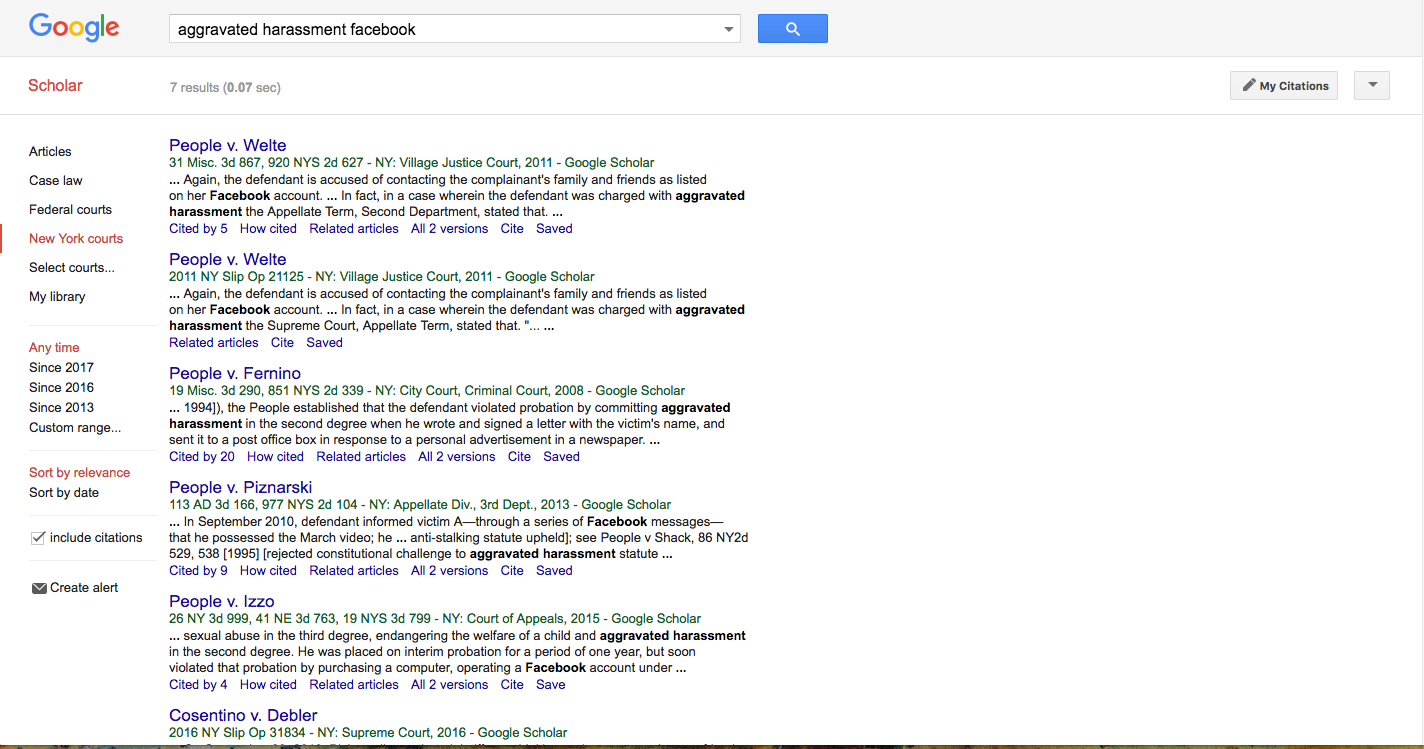
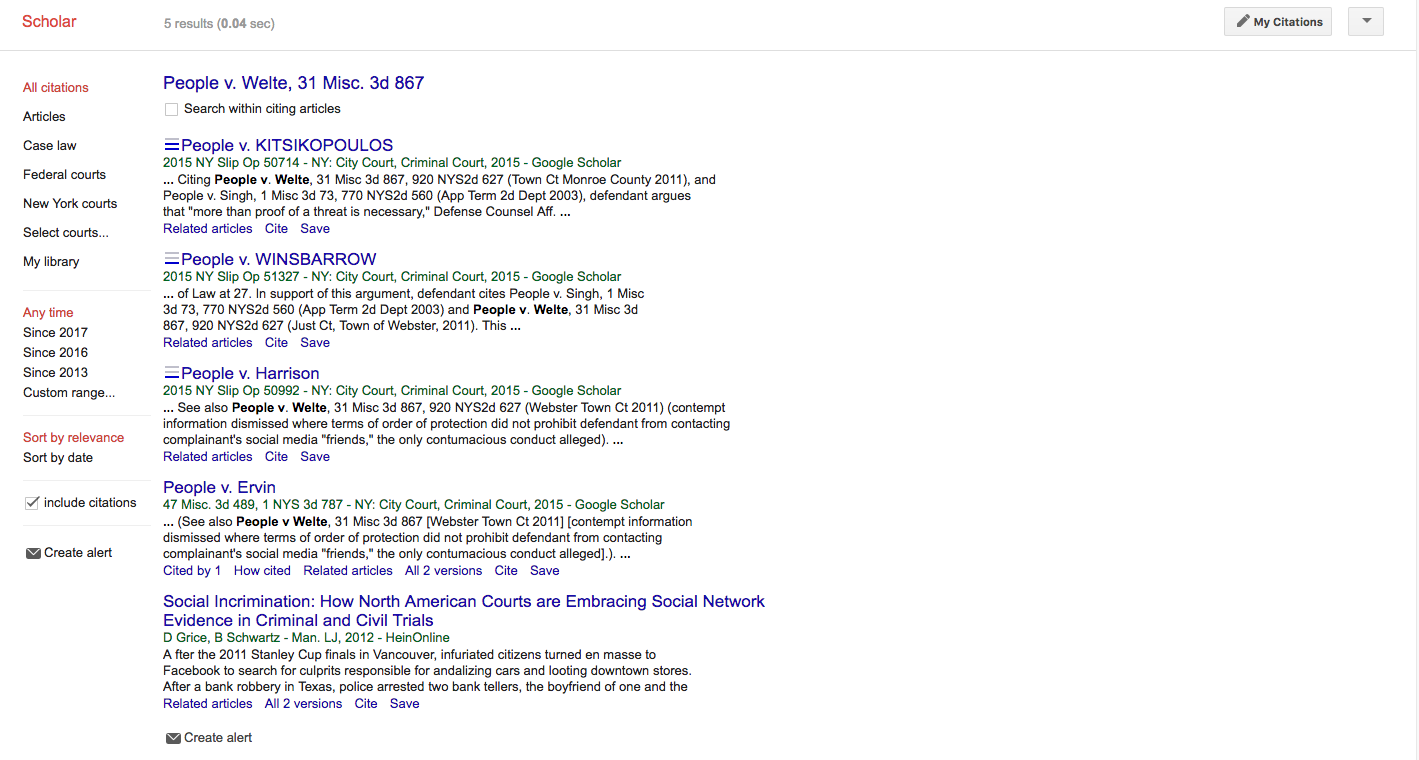
If you return to the original search results page, as shown below, you’ll notice that under each search result, there are a number of fields that you can click on in order to obtain additional information about the case. Using People v. Welte, as an example, if you click “How cited,” you’ll be taken to the page shown above.
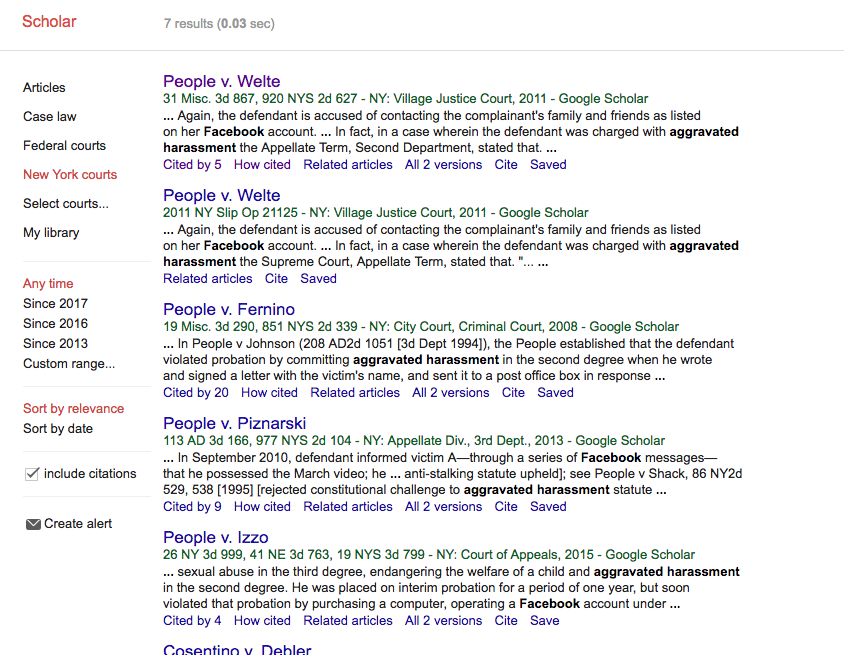
If you click on “Cited by 5,” you’ll be taken to a page shown below that lists only the different cases and legal publications that have cited this case. From there, you can click on the links located directly below the citing case. You can either save the citing case or article to your library (by clicking “Save”) or you can obtain additional information about each citing case or article, including links to related articles (by clicking on “Related articles) and the official citation (by clicking on “Cite”). You can also search within the citation results by checking the field located directly underneath the People v. Welte citation right at the very top of the page:
Saving the case to your library
To save the original case to your library, return to the search results page and click on “Save,” located directly under the case citation on the righthand side. Below you’ll see that the first 4 cases, each of which have already been saved (and thus the word “Saved” appears). But People v. Izzo has yet to be saved, so you would click “Save” in order to save it to your library. To view and organize your library, click on “My library,” located in the middle of the lefthand sidebar.
Organizing or exporting saved items
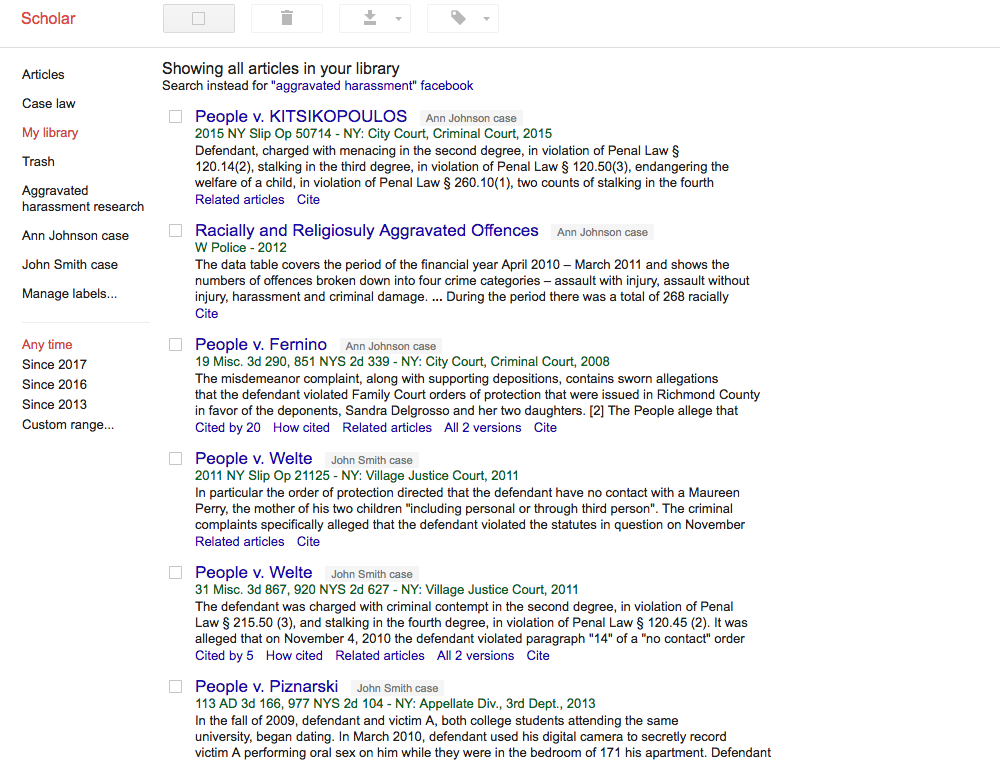
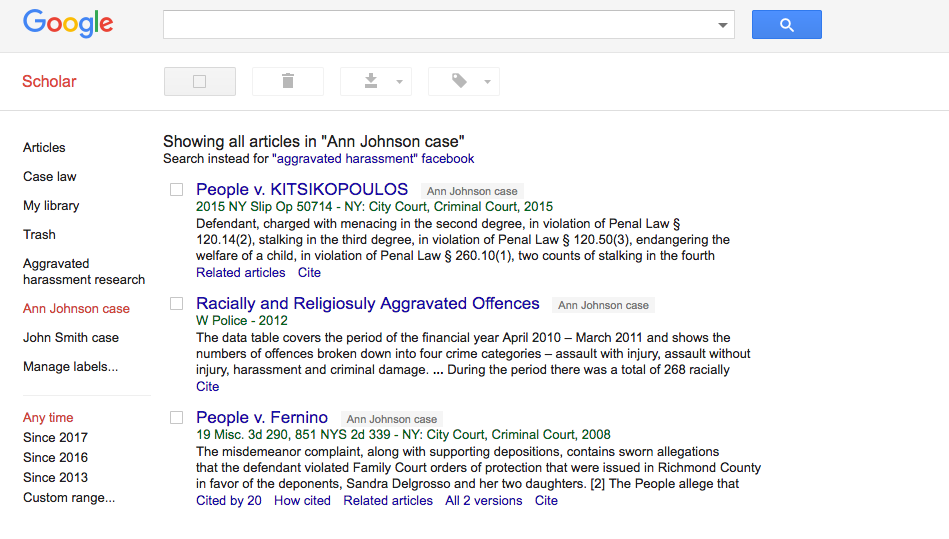
Once you click on “My library,” you’ll be taken to the page shown below where you can view and organize saved items. Items are organized by labeling them with descriptive phrases that you choose. The labels are located to the right of the case or article name. You’ll notice that the first 3 cases have been labeled “Ann Johnson Case” and the last three have been labeled “John Smith Case.”
When you click on the label, you’ll see a list of the cases that have been assigned that label, as shown below:
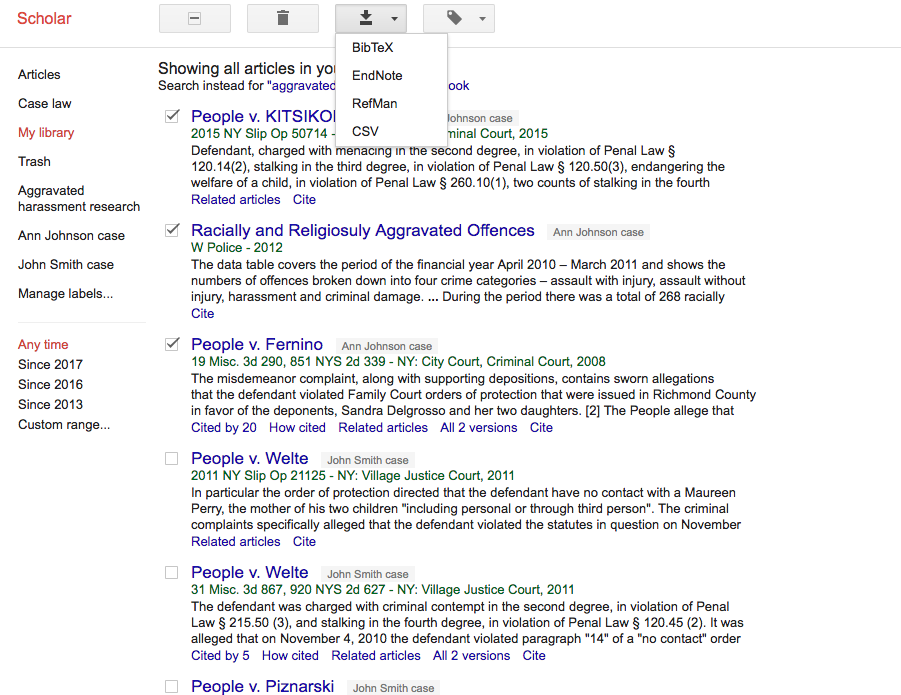
From this page you can either export certain citations or add new labels. To export the cases, check each case that you’d like to export and then click on the downward arrow located near the top of the page. As shown below you can then choose the export format for the case citation list:
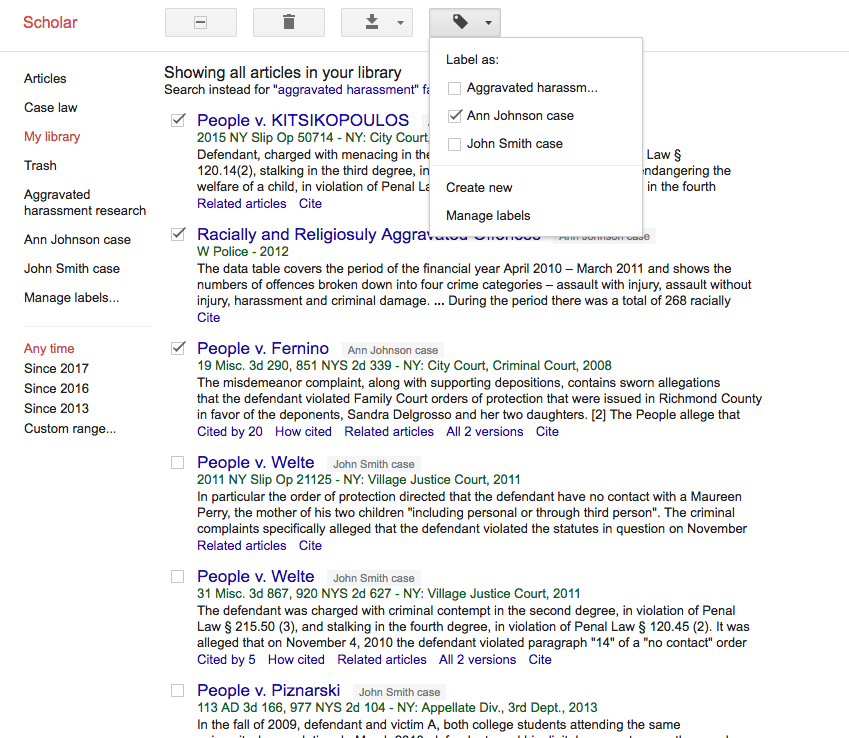
You can also change the labels for a saved case or add or create new labels by clicking on the tag icon located on the far right near the top of the page as shown below:
Sorting saved items
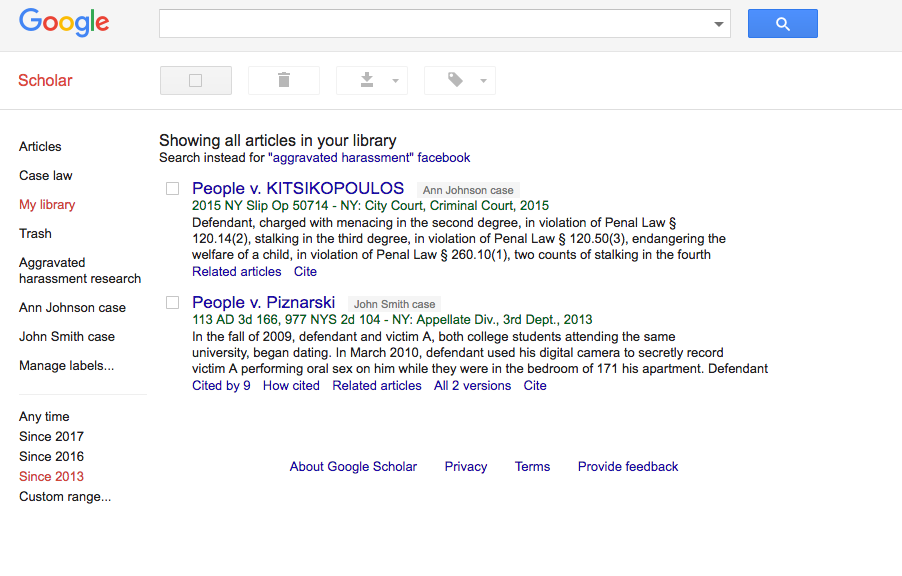
Finally, you can sort saved items by date by clicking on the date ranges found in the bottom of lefthand sidebar. You can choose from one of the listed years or you can create a customized date range. Below, you’ll see that I’ve sorted the cases by those handed down since 2013:
So that’s how to use Google Scholar to conduct free legal research. Interested in exploring low-cost legal research tools even more? Then make sure to watch the full recording of our webinar, “Google Scholar And Legal Research Tips.” Soon you’ll learn everything you need to know about using free or low-cost legal research tools in your solo or small law firm!